Leidian Simulator uses YiLu Static IP
Last updated on:2025-01-13 08:15:12
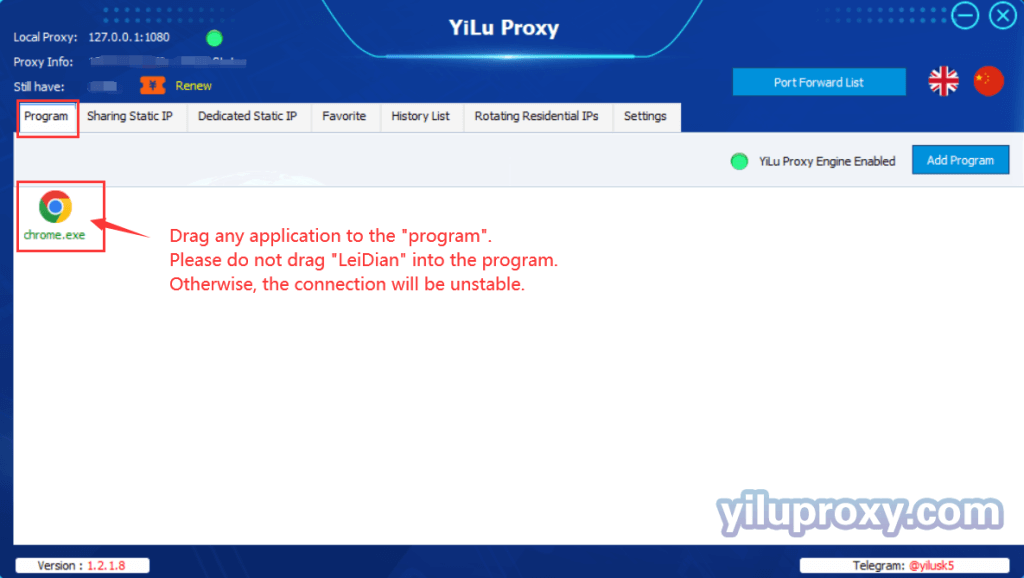
1. Open the YiLu client, and add any application to the "Program" page, please do not add "LeiDian" to the YiLu program, otherwise, the connection will be unstable;
2.YiLu settings:
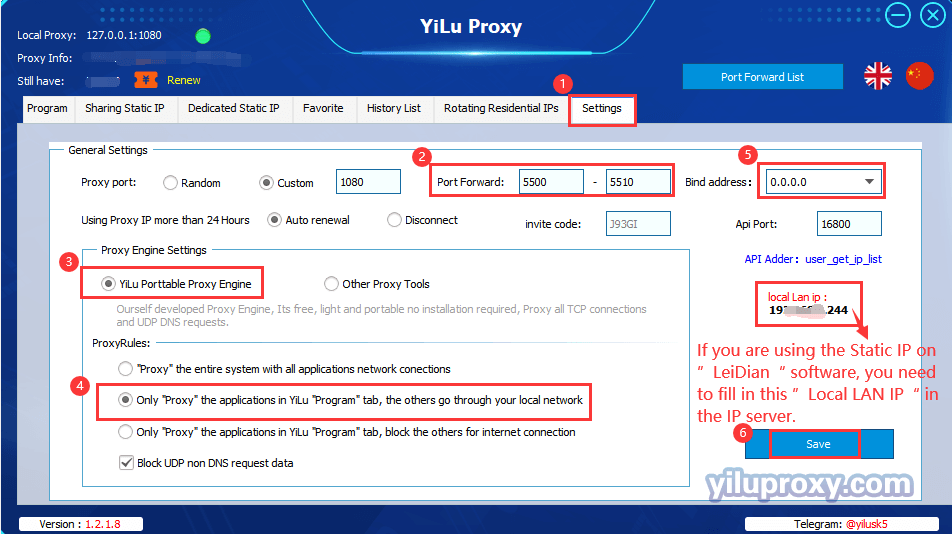
① Click on the YiLu "Settings" page;
② Port Forward: Set the port range according to your needs. One port represents one IP address.
③ Select "YiLu Porttable Proxy Engine";
④ Select "Only ‘Proxy’ the applications in the YiLu ‘program’ tab, the others go through your local network";
⑤ Select "0.0.0.0" for the Bind address;
⑥ Other options can be set by default -> Click "Save";
Note: The Local Lan IP is the “Server Address” of “Postern” in the “LeiDian” simulator.
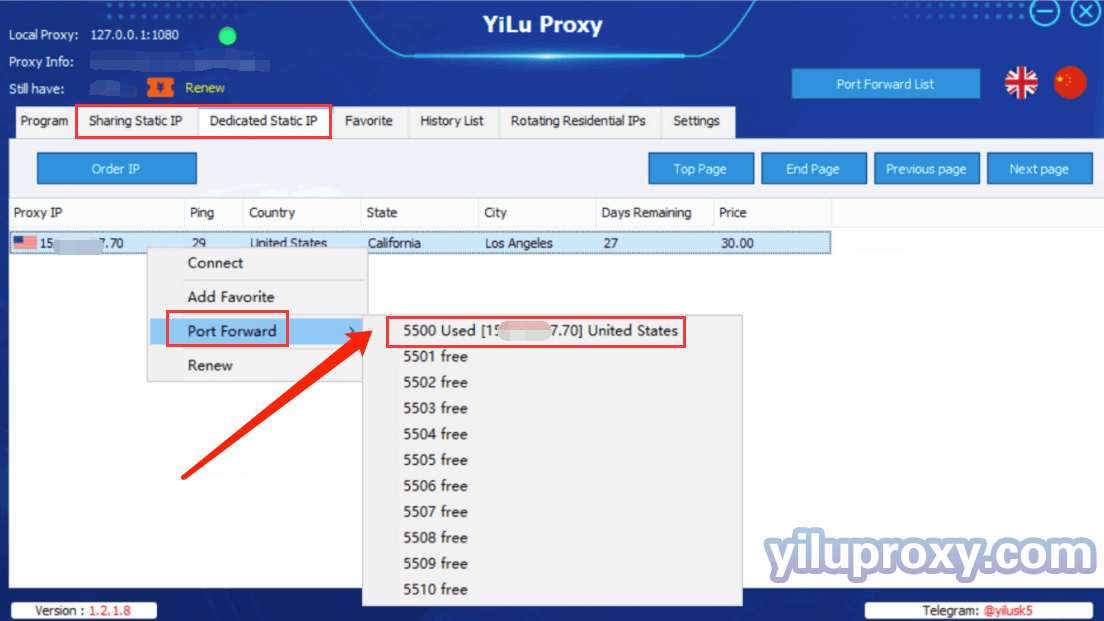
3.Sharing Static IP/Dedicated Static IP port forward:
① Click the “Dedicated Static IP” page (Sharing Static IP’s settings method is the same );
② Click “Order IP” to purchase an IP, then right-click to select the “Port Forward”;
③ Select a Port for this IP like 5500;
4.“LeiDian” simulator "Postern" settings:
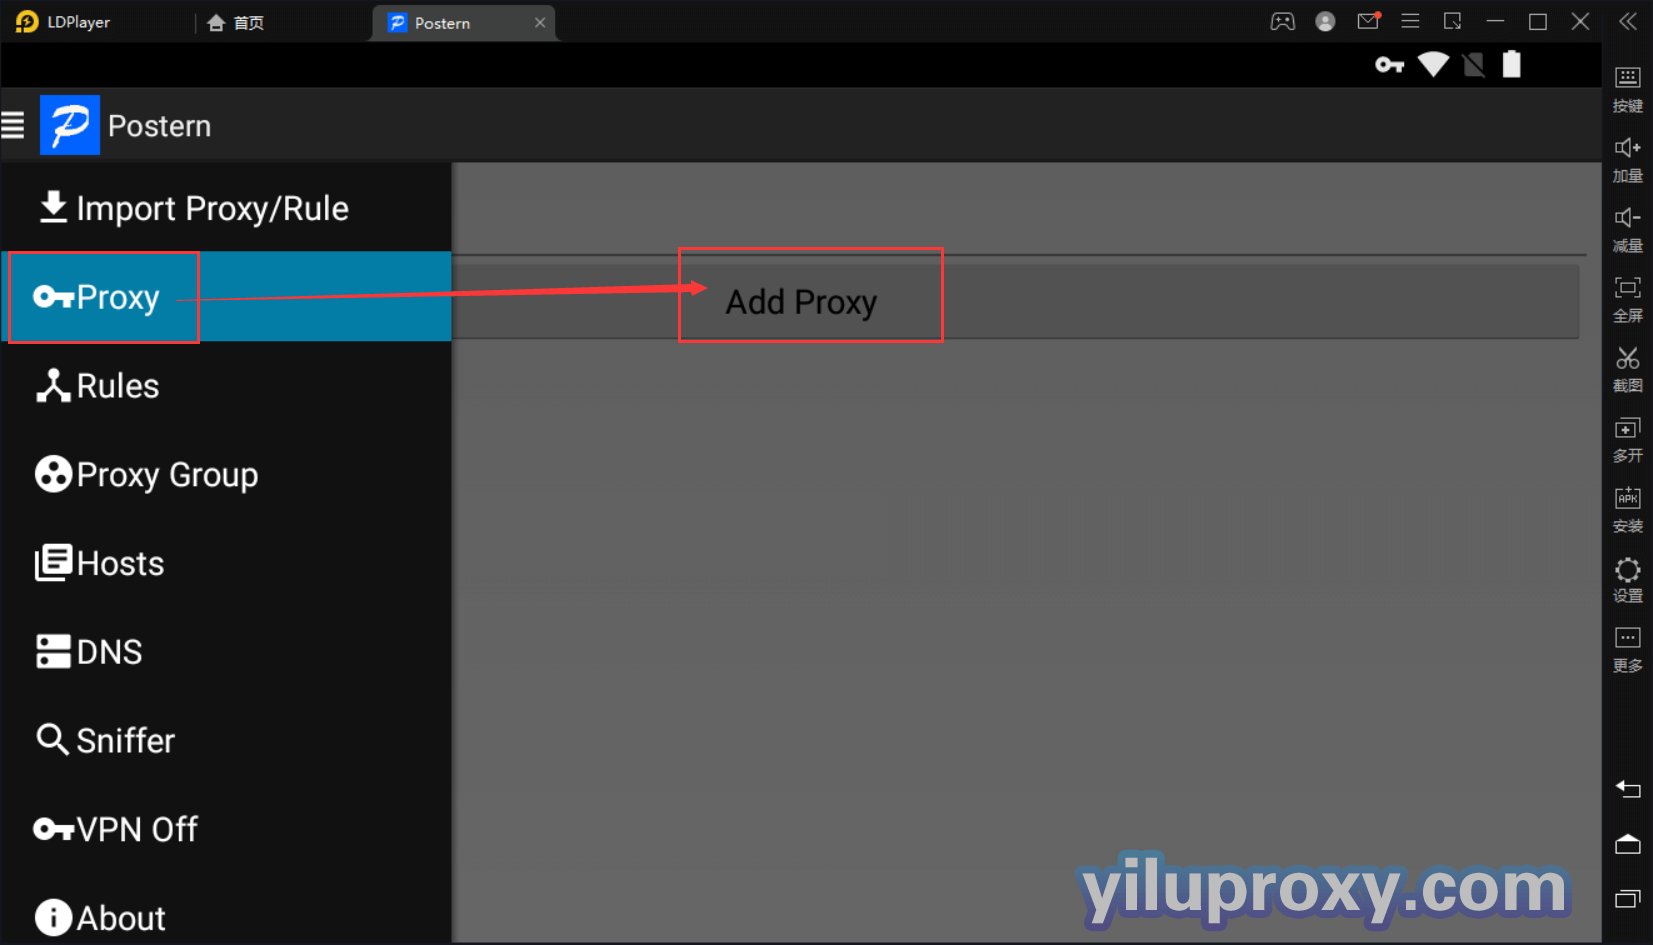
① Open the "Postern" ;
② “Proxy” -> Click "Add Proxy " to add proxy;
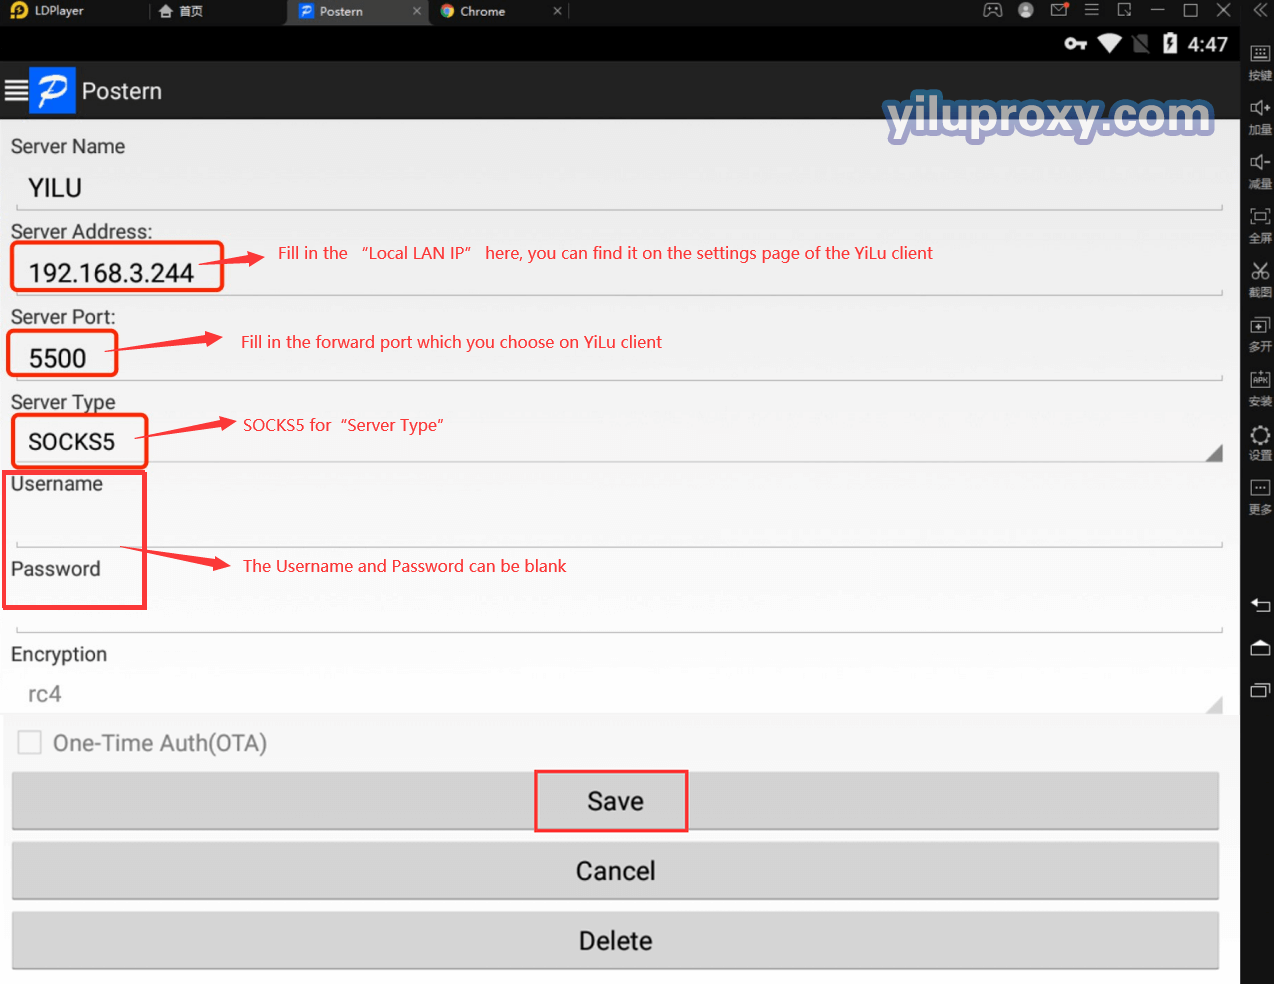
③ Fill in the relevant IP information in the form and save it;
- Server Name: Fill in the name according to your needs;
- Server Address: Fill in the “Local Lan IP”, you can find it on the YiLu’s settings page;
- Server Port: Fill in the forward Port which you choose on the YiLu client;
- Server Type: SOCKS5 Type;
- Username and Password: Blank.

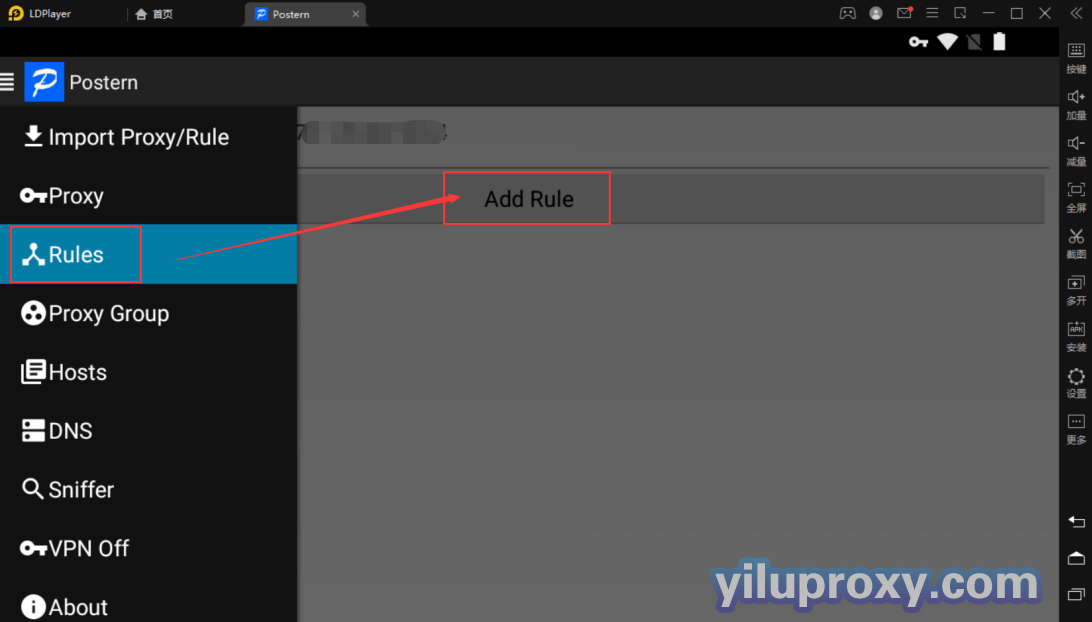
④ Rules -> Click “Add Rule”
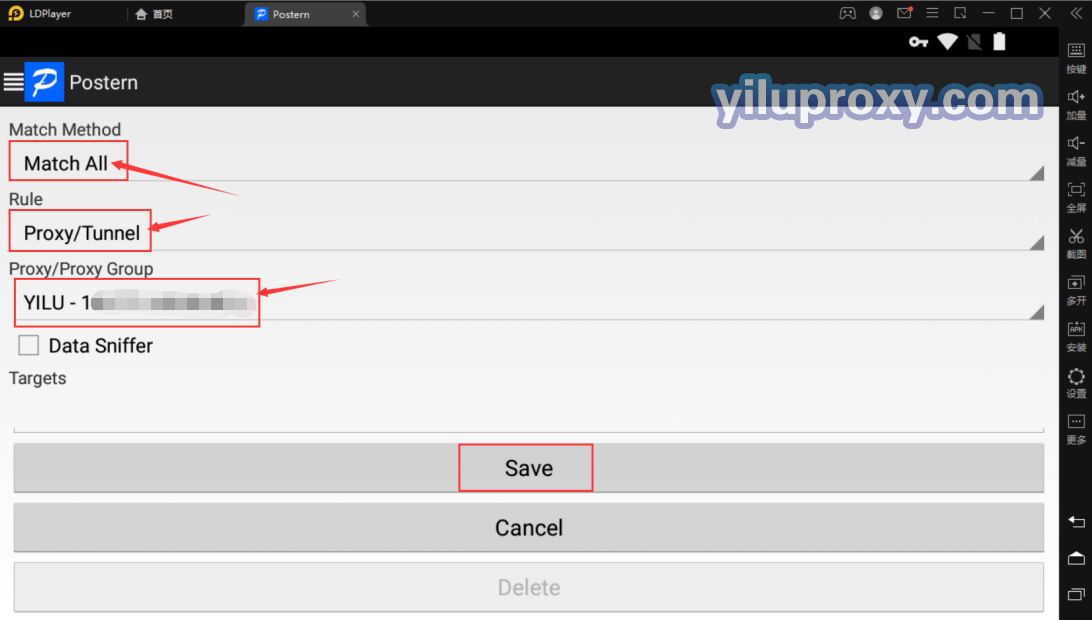
- Match Method - > Select the "Match All” ;
- Rule -> Select the “Proxy/Tunnel”;
- Proxy/Proxy Group - > Select the created proxy;
- Click "Save".
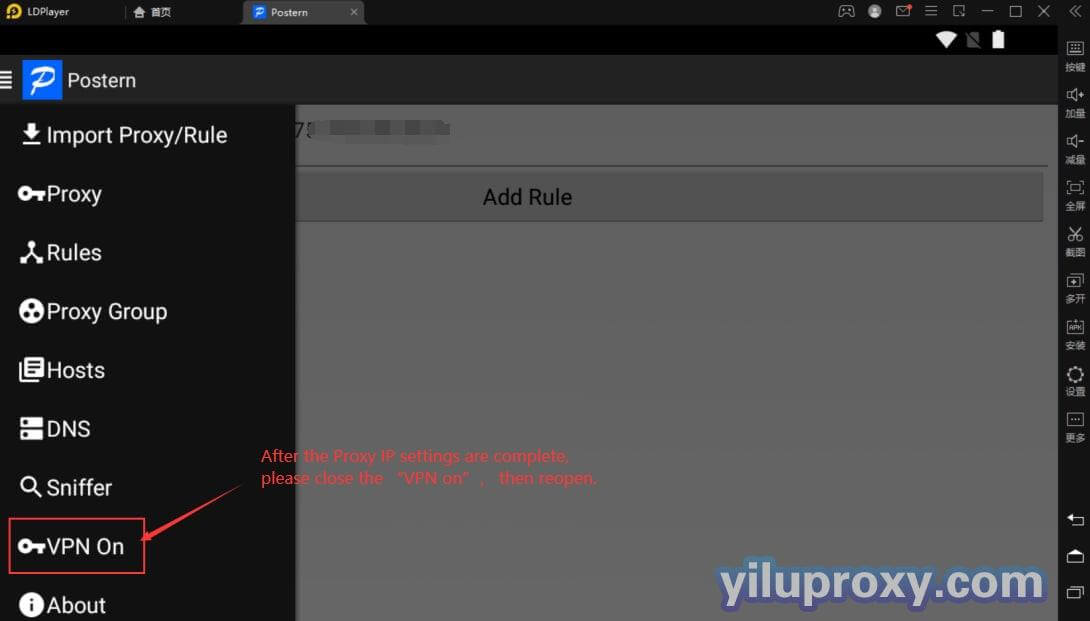
⑤ After the Proxy IP settings are complete, please close the “VPN On”, then reopen;
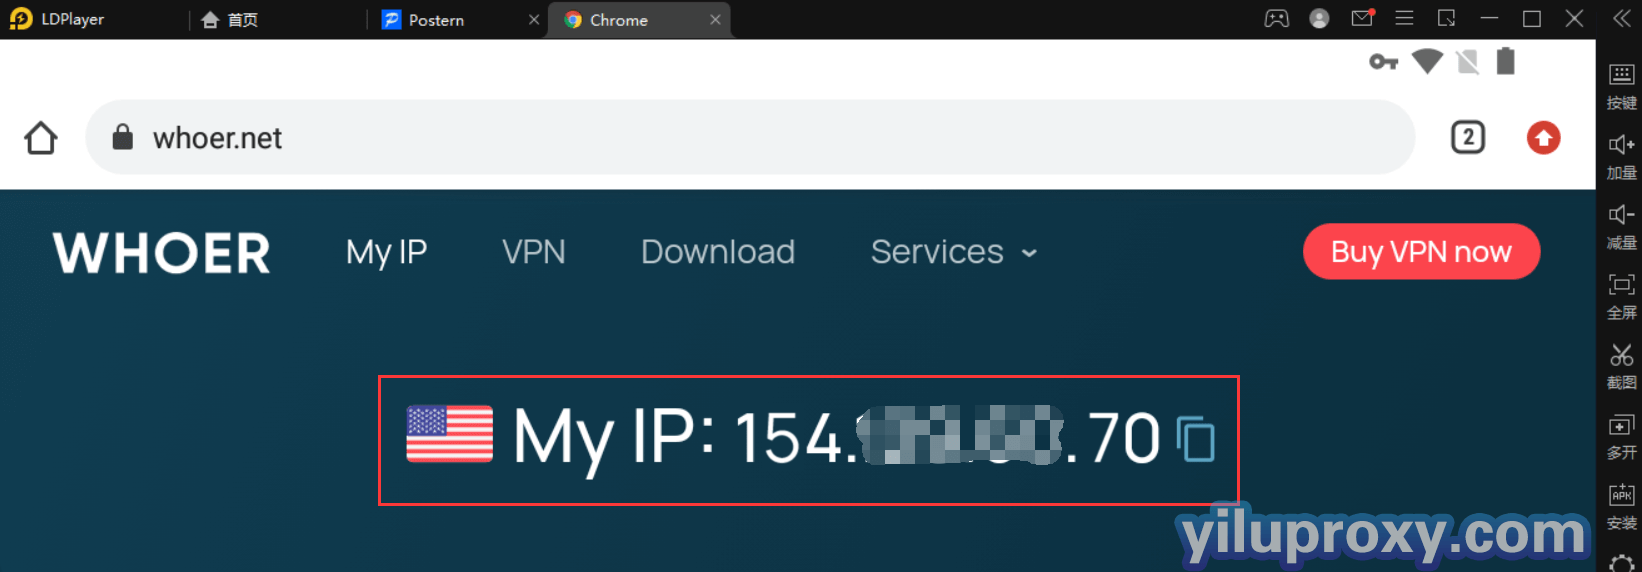
⑥ Open the browser to check whether the IP is changed.